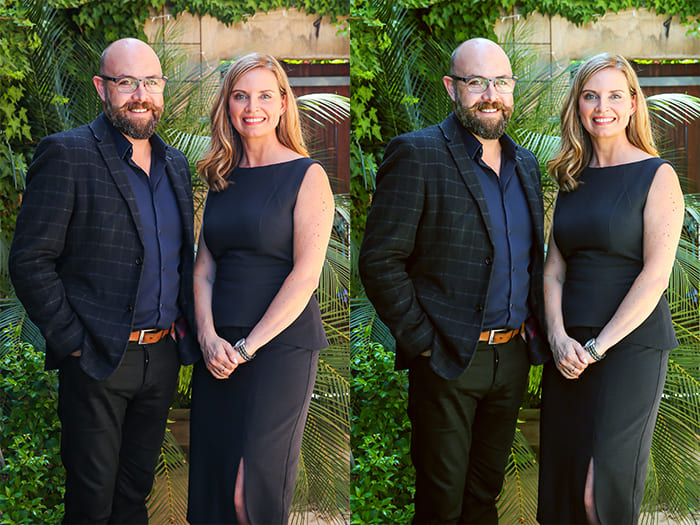
Easy Color Correction Tips to Make Your Photos Pop
In the digital age, capturing stunning images is just the beginning. To truly make your photos stand out, photo color correction plays a crucial role. Whether you’re a professional photographer, a social media enthusiast, or someone who simply loves editing pictures, mastering image color correction can significantly enhance your images. This guide will walk you through easy and effective color correction tips to make your photos pop, ensuring they look professional and eye-catching.
Why is Color Correction Important?
Photo color correction is the process of adjusting an image’s colors to achieve a balanced and realistic look. It helps in:
- Enhancing the overall aesthetics of the photo.
- Correcting lighting and exposure issues.
- Ensuring consistency across a set of images.
- Bringing out the true colors and vibrancy of a scene.
Now, let’s explore some practical and easy-to-follow color correction techniques that can transform your images.
1. Use Auto-Correction Tools for Quick Fixes
Most photo editing software like Adobe Photoshop, Lightroom, and even mobile apps like Snapseed come with auto-correction features. These tools analyze the image and adjust exposure, contrast, and color balance instantly. While auto-correction may not be perfect, it provides a solid starting point for further adjustments.
How to Use Auto-Correction in Lightroom:
- Open your image in Lightroom.
- Click on the “Auto” button under the “Basic” panel.
- Adjust further if necessary to fine-tune the results.
2. Adjust White Balance for Natural Tones
White balance ensures that whites appear neutral rather than tinted. Incorrect white balance can make an image look too warm (yellowish) or too cool (bluish).
Steps to Adjust White Balance:
- In Lightroom, go to the Develop module and use the “Temperature” and “Tint” sliders.
- For Photoshop users, use the Curves adjustment layer and select the neutral gray point.
- Many editing apps provide a White Balance tool where you can select a neutral color in the image to correct the tones.
3. Fine-Tune Exposure, Contrast, and Brightness
Balancing the exposure and contrast is crucial to achieving a natural and appealing look. If an image is too dark or too bright, it loses its detail and impact.
- Increase Exposure to brighten the image.
- Adjust Contrast to enhance details.
- Use the Brightness slider to add vibrancy without overexposing highlights.
Pro Tip:
Always check the Histogram in your editing software. A well-balanced histogram should have a good range of shadows, midtones, and highlights.
4. Enhance Colors with HSL Adjustments
HSL (Hue, Saturation, and Luminance) adjustments allow precise control over specific colors. This tool is useful for bringing out certain tones without affecting the entire image.
Steps to Use HSL Panel in Lightroom:
- Navigate to the HSL/Color panel.
- Adjust Hue to change the color shade (e.g., making a sky bluer).
- Modify Saturation to intensify or mute colors.
- Control Luminance to make colors appear brighter or darker.
5. Use Curves for Advanced Color Correction
Curves adjustment is a powerful tool to fine-tune colors and tones. It allows you to adjust highlights, midtones, and shadows separately.
How to Use Curves in Photoshop:
- Open Curves Adjustment Layer (Ctrl + M / Cmd + M).
- Adjust the RGB curve for overall brightness.
- Modify individual Red, Green, and Blue channels for image color correction.
- Create an S-curve for a contrast boost.
6. Apply Selective Color Adjustments
Selective color editing allows you to adjust specific colors in an image without affecting others. This technique is useful when you want to enhance the sky, adjust skin tones, or correct color imbalances.
Steps:
- In Photoshop, go to Image > Adjustments > Selective Color.
- Choose a color range (e.g., Blues for sky, Reds for skin tones).
- Adjust the Cyan, Magenta, Yellow, and Black sliders for fine-tuning.
7. Use Gradient Maps for Color Toning
Gradient maps are an excellent way to create cinematic color effects. They work by mapping colors to different brightness levels in your image.
How to Apply Gradient Maps:
- Open Photoshop and create a Gradient Map Adjustment Layer.
- Select a gradient that complements your image.
- Adjust the Opacity or blend mode (e.g., Soft Light) for a subtle effect.
8. Correct Skin Tones for Portraits
One of the most challenging aspects of photo color correction is ensuring natural skin tones. Incorrect skin tones can make a subject look unnatural.
Quick Fixes:
- Reduce excessive reds in the Selective Color Adjustment.
- Use the HSL Panel to fine-tune skin tones.
- Apply a softening effect using a low-opacity brush to blend skin colors naturally.
9. Add Vibrance Instead of Saturation
Saturation affects all colors equally, which can lead to unnatural results. Vibrance, on the other hand, enhances muted colors while protecting skin tones.
When to Use Vibrance:
- If your image looks dull but you want to maintain a natural feel.
- When working with portraits to keep skin tones balanced.
- If you want to increase the intensity of specific colors without oversaturation.
10. Save and Export with the Right Color Profile
After perfecting your image color correction, saving and exporting correctly is essential to maintain your edits.
Best Practices:
- For web use, save in sRGB color profile.
- For printing, use Adobe RGB or CMYK.
- Export high-quality JPEG or PNG files with minimal compression.
Conclusion
Mastering photo color correction is a game-changer for photographers, designers, and social media enthusiasts. By following these easy tips, you can enhance your photos and make them stand out. Whether you’re adjusting white balance, using HSL controls, or fine-tuning curves, each technique helps you achieve visually stunning results.
Want professional photo color correction services? Our expert team at Retouch Company offers top-notch image color correction services to enhance your visuals effortlessly. Contact us today to transform your photos into masterpieces!
By implementing these techniques, your photos will not only look professional but will also attract more attention, engagement, and appreciation. Happy editing!
Leave a Reply